Drop Step and Pivot -> Dynamic Balance -> Direction -> Power Position -> Release, Extension and Follow-Through
Source: Trent Mongero, Winning Baseball
Windup Delivery
Typically, most pitchers will work from the windup delivery when there are no baserunners aboard or there is only a runner on third base.
Most right-handed pitchers throw from the right side of the pitcher’s rubber, and most left-handed pitchers throw from the left side of the pitcher’s rubber to create more deception with the pitch angle to the plate. However, a pitcher’s first concern is comfort over his placement on the rubber, and he should make an adjustment in his placement if it improves his ability to throw strikes.
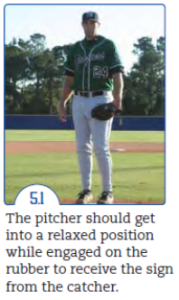
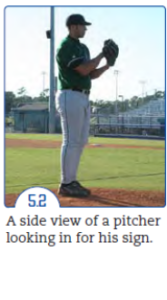
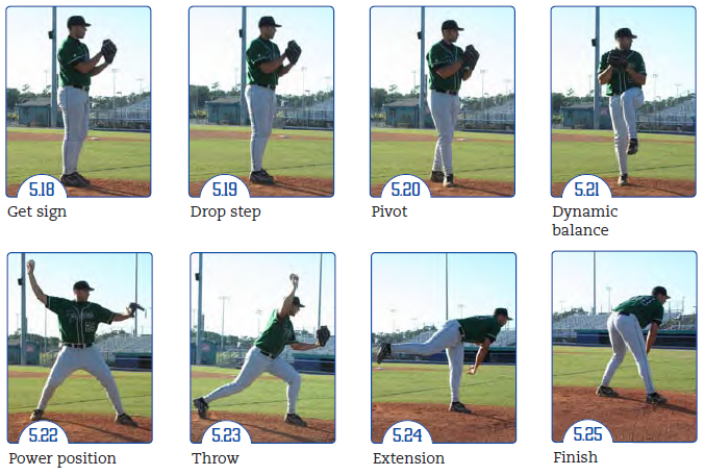
Phase 1: Drop Step and Pivot
- Pitcher must be relaxed before starting his pitch.
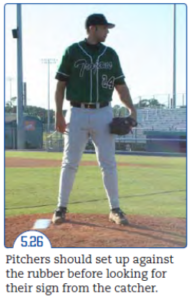
- Feet are approximately shoulder width apart, with both feet in contact with the pitcher’s rubber.
- Body should be squared to the plate or turned slightly to his throwing side. For example, a right-handed pitcher may slightly face third base.
- Glove and throwing hand should be together and positioned somewhere between his belt and chest-high.
- Receive pitch signal from the catcher.
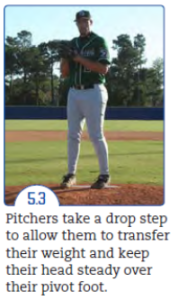
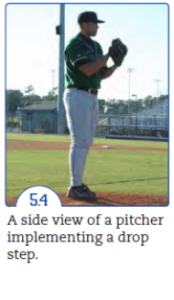
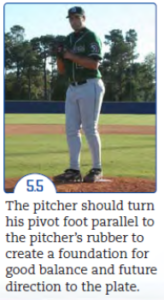
- Begin windup by taking a short drop step directly back or at a forty-five degree angle with the glove-side foot. This movement creates rhythm while allowing the pitcher’s weight to lightly transfer to his back, glove-side foot, just long enough to allow the pivot foot to lift. Secret: Some pitchers choose to modify their drop step by taking it directly to their side or even slightly in front of their pivot foot. This is acceptable as long as the player’s head stays still over his pivot foot, and he can create consistent low and high dynamic balance with his knee lift.
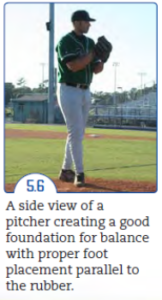
- Simultaneously, he should turn his throwing-side foot parallel and against the front of the pitcher’s rubber. This position allows the player to create good balance and direction to the plate while keeping his head motionless over his pivot foot.
Phase 2: Dynamic Balance
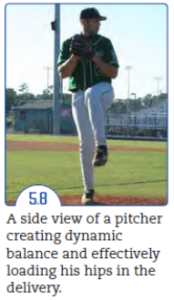
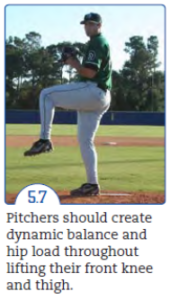
- Once the pitcher has planted his pivot foot firmly parallel to and on the front side of the rubber, he should raise his glove-side knee and thigh to a comfortable height, all the while keeping his head over his back foot.
- As he raises his knee, he should slightly flex his back knee as he turns his front knee in towards the centerline of his body to load his hips.
- It is critical that he maintains his balance through the lowest and highest levels of the thigh lift.
- The pitcher should allow his front foot to relax so his toe is pointed slightly towards the ground. This helps him maintain his balance.
- The pitcher’s hands and front knee should be in sync to help the player maintain rhythm and tempo in his delivery. For instance, if he chooses to start his hands high in his setup, they should remain there until the knee has reached its highest point. Once the knee drops to start the lateral direction to the plate, his hands should follow. The other scenario consists of a pitcher who starts his hands low in his setup. The player should raise his hands with his front knee as if they were attached with a string. Then the knee and hands will continue to mirror each other on the way down.
Phase 3: Direction
- A pitcher’s goal is to create a controlled lateral movement to the plate by leading with his front side and driving with his back side.
- As his hands follow his front knee down, they should separate near his navel.
- As the thumb of the gloved hand works down, forward, and up, finishing where the glove-arm elbow is pointed at the catcher, the thumb of the throwing hand works down, back, and up, finishing with the back elbow shoulder-high, with the ball pointed away from the target.
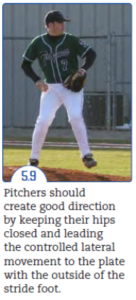
- Simultaneously, the lower body creates direction by striding directly to the plate and leading with the outside of the front heel in order to keep the pitcher’s hips closed and loaded as long as possible. The stride foot will eventually rotate so the toes are pointed at the plate just before the foot lands on the ground.
- The player’s eyes should be focused on the catcher’s mitt..
- When a pitcher keeps his upper body and hips closed as long as possible, it creates tremendous torque or hip rotation, which equates to greater arm speed, hand speed, and ball speed.
Video: Pitching Mechanics – Phase 4 (Power Position) to Phase 5 (Release and Finish) (Winning Baseball) (6 min.) ![]()
Phase 4: Power Position
The fourth and fifth phase of a pitcher’s delivery happen in a fraction of a second. However, it is important to be able to visualize what a power position looks like.
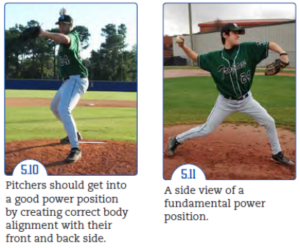
- As soon as the player’s stride foot touches the mound to create a power position, the body quickly places a large workload on the throwing shoulder and elbow.
- Stride foot should also be pointed at the plate (slightly closed).
- Knees and hips are flexed.
- Head is centred with his feet and the chin is resting near his front shoulder.
- Eyes are peering in at the catcher’s target.
- Throwing arm is bent at almost a 90 degree angle.
- Ball is facing behind the pitcher.
- Back elbow should be shoulder high and ball hand should be above the elbow.
- A right-handed pitcher will hold the ball near a ten o’clock position with his throwing hand palm facing the shortstop.
- A left-handed pitcher will hold the ball near a two o’clock position with his throwing palm facing the second baseman.
- Player’s front elbow and shoulder should be pointed directly at the target.
Potential Flaws
Front Shoulder Off Line
Bringing the front shoulder in (closed position) and the back shoulder out will result in an inconsistent release point and put undue stress on the arm and shoulder.
Don’t Overstride or Understride
A pitcher should use his body efficiently and not overstride or understride into his power position. Ideally the player should have a stride length somewhere close to five and one-half times his own foot length.
Secrets
Glove Should Be Slightly Lower Than Front Elbow
When the pitcher is in his power position, his glove should be slightly lower than the front elbow and be pointing down to help generate more torque in his delivery.
The pitcher should push off of the pitcher’s rubber with the inside of his back toe to create more torque with the hips and add momentum into his delivery.
Phase 5: Release, Extension and Follow-Through
- When the pitcher’s stride foot lands (foot plant), his front knee should be in a firm position in order to give the body a firm foundation to work around.
- The pitcher can then deliver the pitch to the plate by accelerating the baseball from behind his body to the release point out in front of his body.
- The throwing elbow will naturally transition from a bent position to extension as the player’s chin moves forward directly towards the target.
- During the throw, the pitcher’s glove-side elbow should naturally transition from pointing at the target to a position beside the hip.
- The pitcher’s lower body will contribute energy into the pitch by pushing off the rubber with the back leg, which creates momentum and accelerates the hips to help complete their rotation.
- The pitcher should release the ball by snapping his wrist hard to create backwards rotation (a fastball).
- A pitcher should visualize that his is throwing through a narrow hallway to the catcher’s glove so neither his body parts nor the ball hit the imaginary walls.
- Once the ball is released, the pitcher should finish his mechanics by allowing his throwing hand to pronate (a natural motion where the hand turns counterclockwise with thumb finishing at bottom) and come to rest just outside his stride-foot knee.
- The glove turns from pointing down to pointing up and facing the pitcher and then folds in and then down.
- The glove-arm elbow should naturally transition from beside his glove-side hip to somewhere behind the hip so the throwing shoulder can finish pointed at the target.
- During the release of the ball, the player’s back foot will drag along the mound for a short distance and then release off the ground, swing with heel to the sky, and eventually finish in front of or beside the stride foot. This process allows the hips to finish rotating and to return to a position to field the ball.
- On the follow-through, the pitcher’s back should flatten out or get close to parallel to the ground.
- At the finish, the pitcher should be balanced and ready to field a ball.
Potential Flaws
Pulling or Jerking Front Shoulder and Head Out
If a pitcher attempts to create extra ball speed by “pulling” or jerking his head and front shoulder out rather than keeping them straight and facing the plate, this will create an inconsistent release point and place extra strain on the shoulder and elbow.
Secrets
Consistent Release Point
A pitcher should attempt to create a consistent release point for every pitch in his arsenal. This will effectively create deception, as a batter will have more difficulty determining the actual pitch in flight.
Take Nose In Direction of Catcher’s Mitt
The pitcher should try to take his nose in the direction of the catcher’s mitt to help keep his body in line and allow the body to be in the best position to assist decelerating the arm.
Bring Chest to Glove To Keep Elbows Close Together
By bringing the chest to the glove allows the pitcher to move directly to the plate and allows the elbows to work together as they come closer together and create a more efficient throw which also protects the arm.
Control the Head
Keeping his head centred and straight and working the head over the front knee will help to ensure that his energy is staying in line right down the tunnel towards the plate.
Video: The Five Phases of Pitching (ABCA) (3 mins) ![]()
Stretch Delivery
Video: Stretch Delivery (Winning Baseball) (3 min.) ![]()
At the Peewee division and above, pitchers will encounter base runners who will attempt to steal bases. Therefore, a pitcher should learn how to implement stretch mechanics. Because many players attempt to simplify the pitching process when they first begin pitching at younger ages, this is not usually a difficult adjustment. However, learning to effectively hold base runners is another problem that must be addressed successfully. Contrary to popular belief, base runners actually steal off the pitcher rather than the catcher. Therefore, a pitcher must learn to give his catcher a chance to throw out base stealing attempts by varying his looks and moves to a base and working quickly to the plate. Most pitchers choose to implement some type of low balance stretch delivery to still benefit from their hip load without sacrificing the time needed to use a high balance delivery.
Phase 1: Set Position
- The pitcher initially creates a good athletic position by placing his back foot parallel to and against the pitcher’s rubber on his preferred side.
- Front foot should be slightly farther than shoulder width from his back foot and his front shoulder.
- Side of front knee and front foot should be aligned directly to the point of home plate.
- From this initial position, the player’s hands can be relaxed at his side, with the ball preferably in his throwing hand, or the player can lean slightly forward, resting the glove against his front thigh.
- He should alternately glance at the catcher giving signs and the base runner establishing his lead.
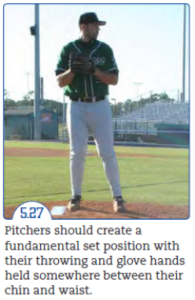
- In order to transition to his “set position,” the pitcher simply adjusts his front foot closer to his back foot while simultaneously bringing both hands together somewhere between his chin and his waist.
- He should pause in this position for a split second while continuing to look at the catcher’s target and the runner on base until deciding to start his delivery.
Potential Flaw: Not Having a Routine Stretch Delivery
When a pitcher does not have an exact routine that he implements on each and every pitch, he may tip his pitches to the batter. The only things that should change are the looks and moves he makes to first base, and the time he spends in his set position so the runner will have a more difficult time getting a quick break or jump when stealing a base.
Secret: Create Initial Open Stance to See Runner Better
Some pitchers prefer to create an initial open stance, with their front foot closer to first base, before they establish their set position. This enables them to see the actual leads that base runners are able to achieve at first base.
Phase 2: Low Balance Load
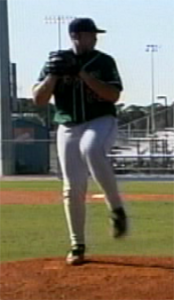
- To create a balance point from his stretch position, the pitcher should raise his front knee to a comfortable position somewhere around the middle of his thigh.
- As with his the windup delivery, the player’s front knee should turn slightly towards the centre of his body. This simple action closes and loads his hips, providing additional torque and power.
- To sync the tempo between his lower body and upper body, the pitcher’s hands should mirror action of the front knee either during the knee lift and/or the descent. For example, if the pitcher’s hands start low in their set position, they should come up as the knee rises and go down when the knee descends. Conversely, if the pitcher prefers his hands high in his set position, he should keep them still on the knee lift and then drop them when the knee falls.
- During the lift and descent of the front knee, the ankle should remain relaxed and close to the back knee.
- Pitcher’s head should be aligned with his navel.
- The pitcher is now in a loaded position, balanced over his back foot.
Flaw: Slide Step
Many pitchers attempt to combat an opponent’s running game by implementing a slide-step delivery. This type of delivery, in which a pitcher simply lifts his front foot and takes it straight to the plate, does save time. However, because there is no hip loading, it places additional stress on the player’s throwing shoulder and elbow. It may also make it more difficult for pitchers to consistently sync their upper body actions with their lower body because of how quickly the lower half works.
Secret: Different Moves to First Base
A pitcher should have different moves that he can use to keep base runners in check. These moves must be practiced and perfected with an emphasis on quick feet and quick release.
Refer to the Windup Delivery section above for the remaining phases.
Source: Trent Mongero, Winning Baseball

